 Install libnss-ldap
In this step, we will show you how to set up an OpenLDAP client using the Debian 10 Buster. Before using this guide, ensure that you have an OpenLDAP server installed on another node or server that the client can be connected to.
For this tutorial, I will use the Debian 10 with 1GB of RAM and 15GB disk space. Also, you must have the root privileges.
What we will do
•.Install and Configure OpenLDAP Client Packages
•.Set Up Name Service Switch (nsswitch)
•.Set Up Pam Authentication and Session
•.Testing
First, we will install LDAP packages on the client-side. We will install the libnss and libpam packges for ldap client.
Install ldap packages for clients using the apt command below.
sudo apt install libnss-ldap libpam-ldap ldap-utils
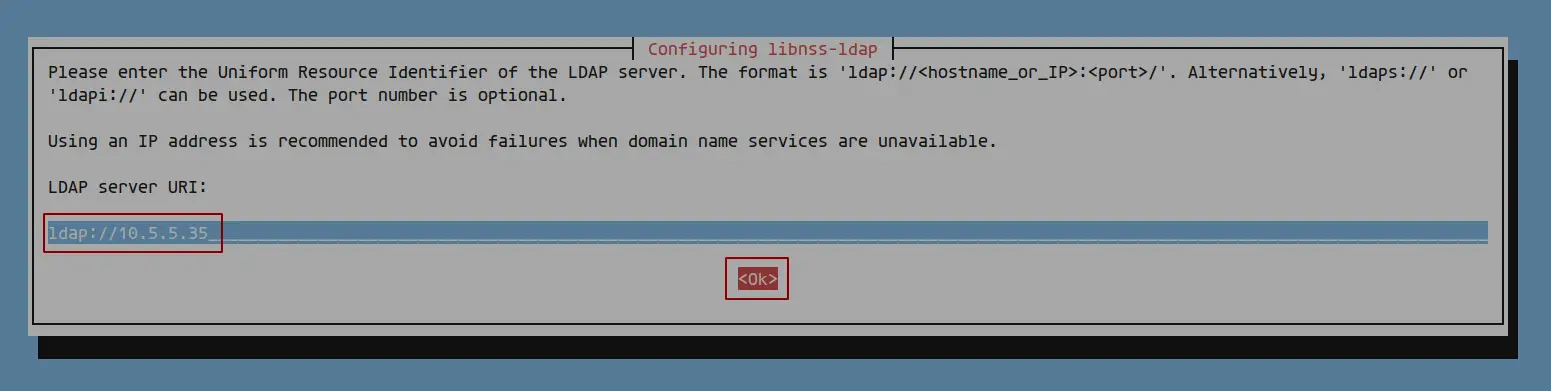
Now you will be asked for the LDAP server IP address. Type your LDAP/LDAPS server IP address and choose 'OK'.
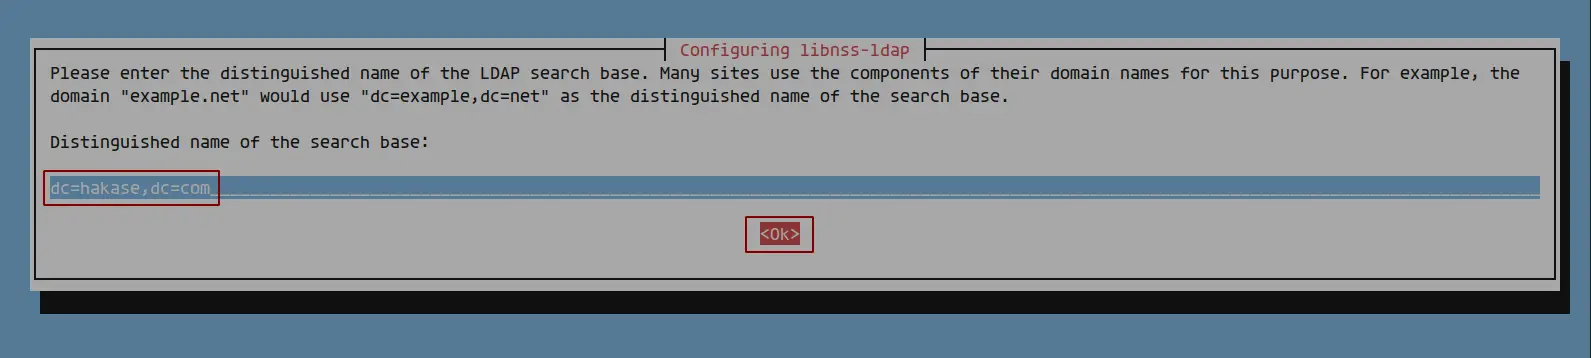
Type the base DN of your LDAP server and choose 'OK'.
Now specify the LDAP protocol version to '3' and choose 'OK'.
Type default LDAP root user (default is admin) and choose 'OK' again.
Now type the password for default admin user.
For the NSSwitch configuration, choose 'OK'.
Next, allow the ldap admin user to hevae like the root user by choosing 'Yes'.
For the LDAP database login password, I choose 'No' in my case.
Now type again the default admin user for LDP server and choose 'OK'.
Type the admin password and choose 'OK' again.
In this step, we will modify the NSSwitch configuration '/etc/nsswitch.conf' to use the ldap as a datasource.
Edit the configuration '/etc/nsswitch.conf' using vim editor.
vim /etc/nsswitch.conf
Now change detail lines exact as below.
passwd: compat ldap
group: compat ldap
shadow: compat ldap
Save and close.
Now the NSSwitch will loopkup information for user authentication to the ldap server.
In this step we will setup the pam password authentiucation by disabling the 'use_authok' module and add optional pam session for automatically create home directory.
The 'use_authtok' module will not prompt the user for a new password, and the 'pam_mkhomedir' module will automatically create home directory for ldap users.
For the pam authentication password, edit the configuration '/etc/pam.d/common-password' using vim editor.
vim /etc/pam.d/common-password
Remove the option 'use_authtok' on the password 'pam_ldap' module configuraiton as below.
password [success=1 user_unknown=ignore default=die] pam_ldap.so try_Step 4 - Testingfirst_pass
Save and close.
Next, edit the pam session configiration '/etc/pam.d/common-session'.
vim /etc/pam.d/common-session
Add the 'pam_mkhomedir' module configuration below.
session optional pam_mkhomedir.so skel=/etc/skel umask=077
Save and close.
As a result, you've set up the PAM module for authentication and session configuration.
Now reboot the Debian client.
sudo reboot
To test the OpenLDAP client installation and configuration, log in to the client system using the user provided by the OpenLDAP server.
Log in using the user 'olaf' that available on OpenLDAP server.
Once the 'olaf' user logged in, a new user home directory for that user will be automatically created.
As a result, the installation and configuration of OpenLDAP client on Debian 10 has been completed successfully.
 Base DN
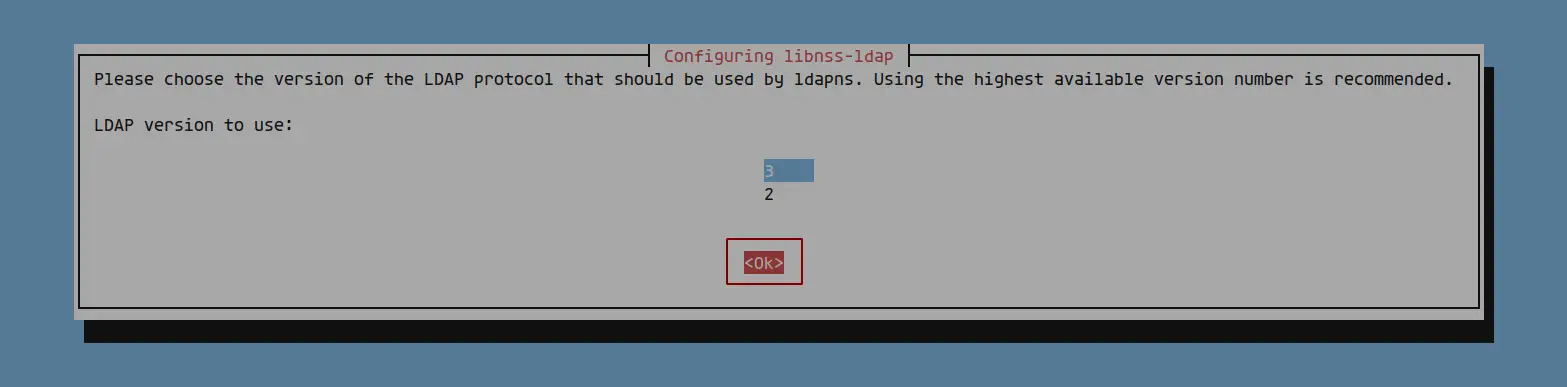 LDAP Protocol version
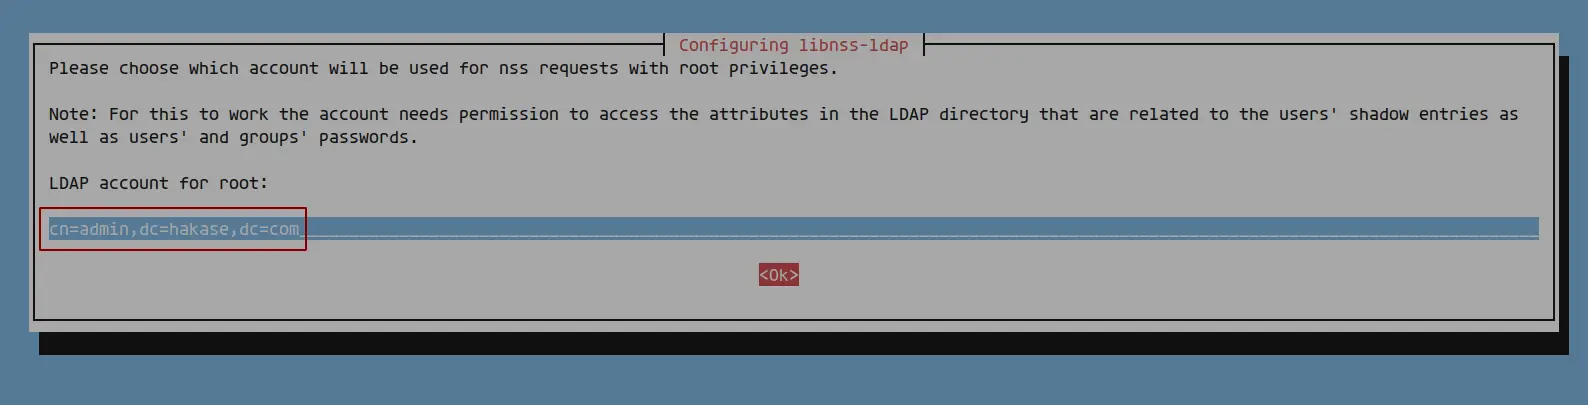 LDAP root user
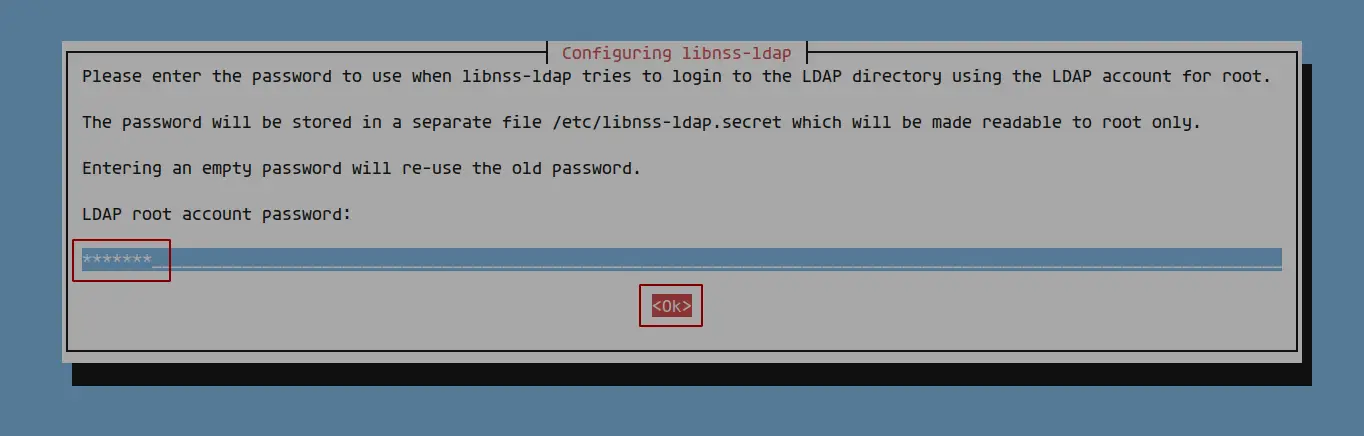 LDAP user password
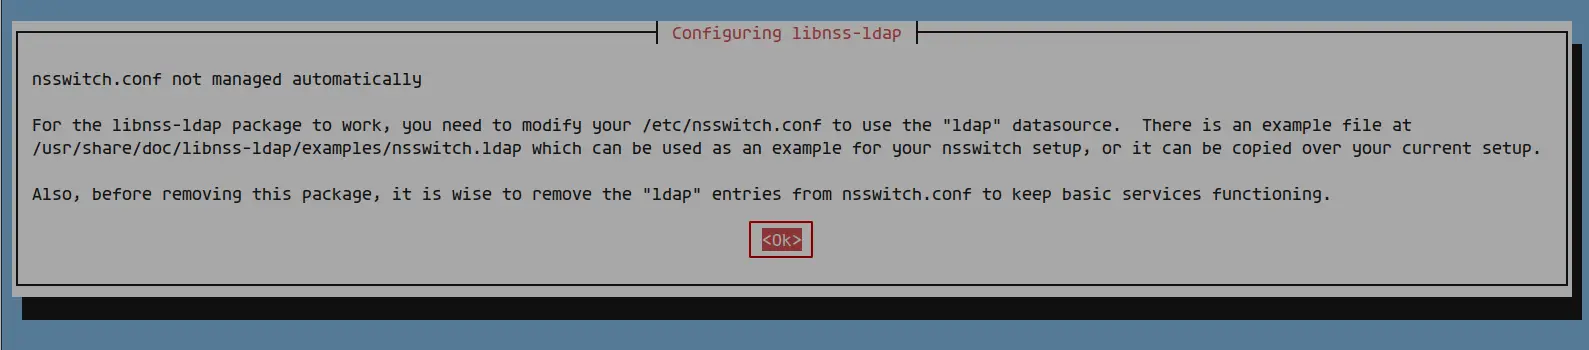 NSSwitch configuration
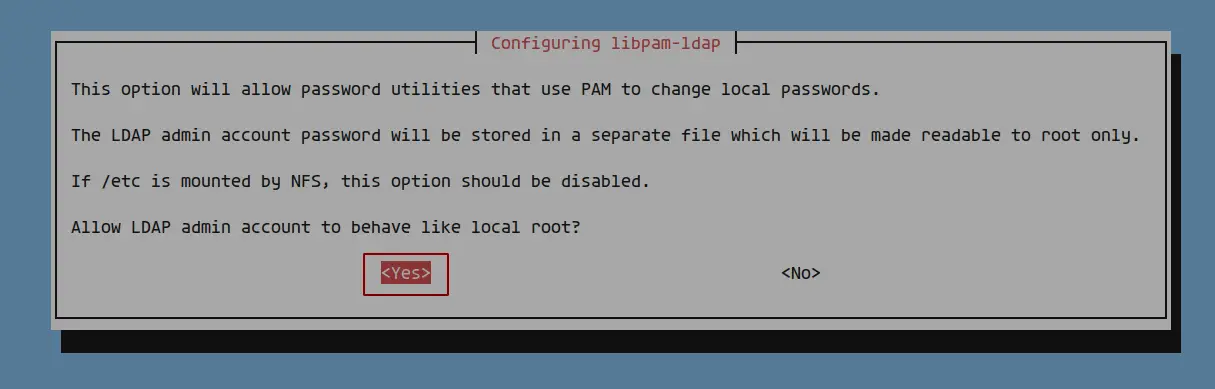 Install libpam-ldap
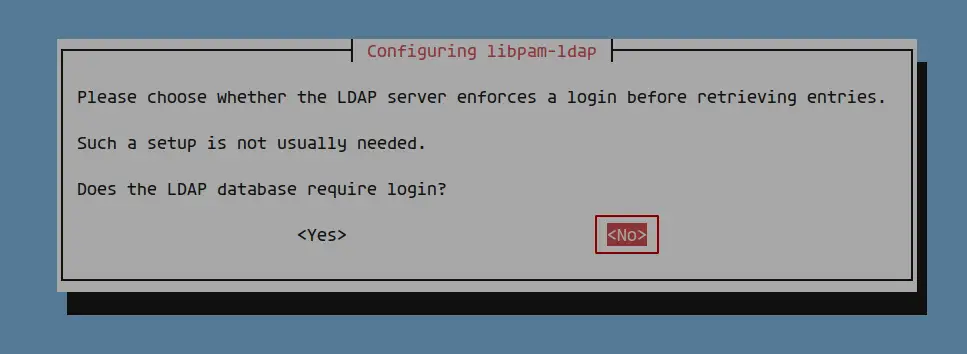 LDAP database login
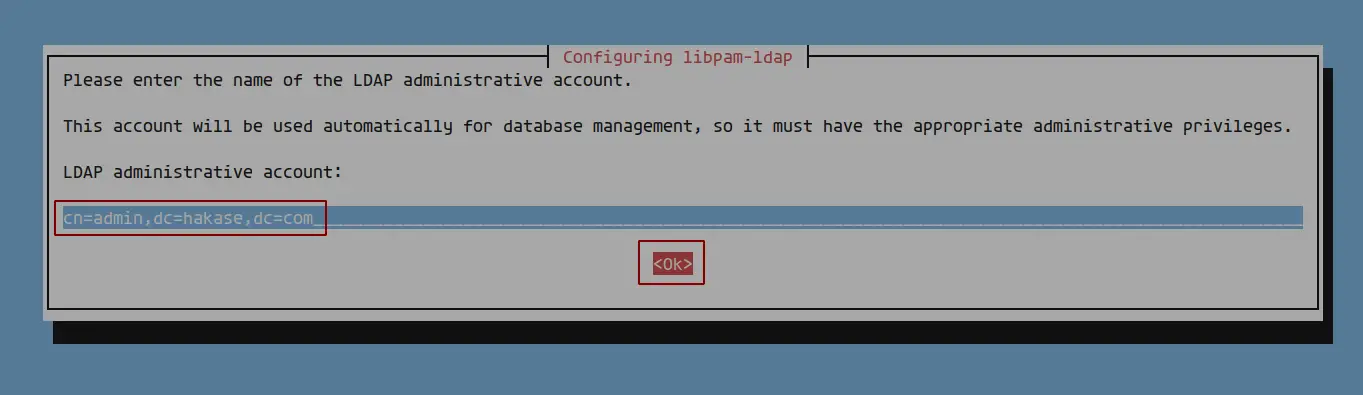 Default admin user
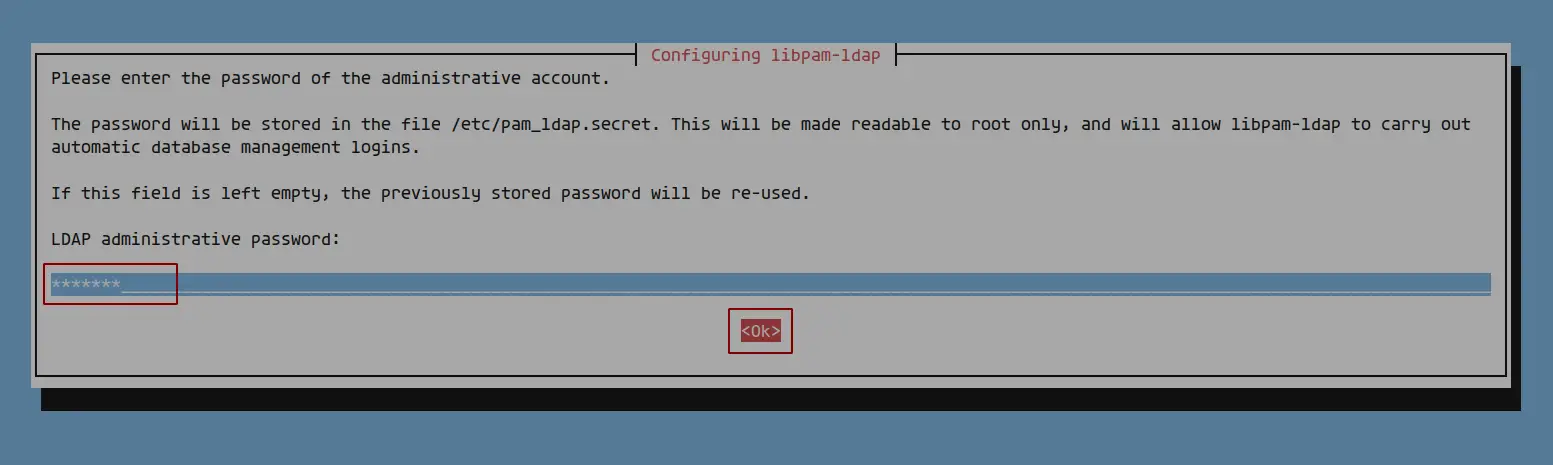 Admin password
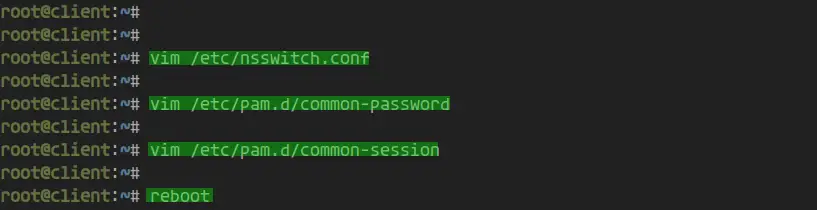 Configure nsswitch and reboot
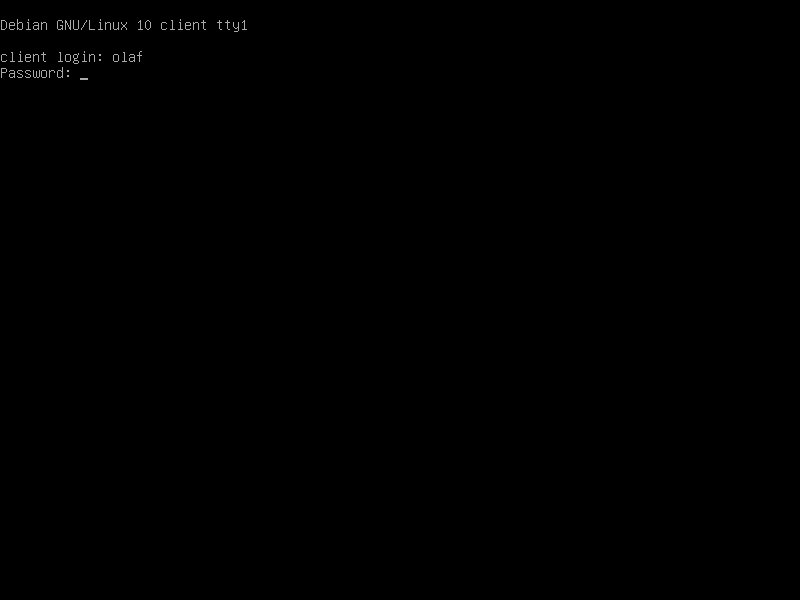 Test OpenLDAP Login
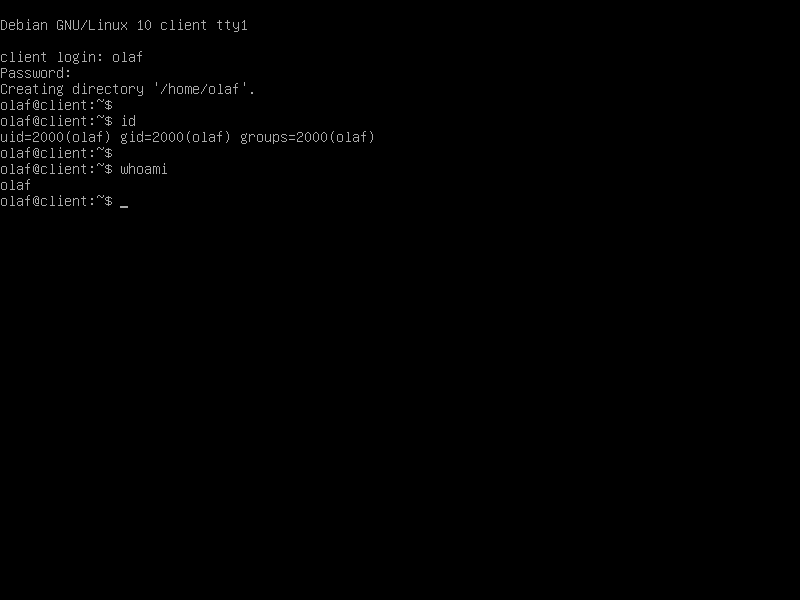 Login successful